Dashboard Mobile Home Assistant Bubble Card Pop up Smartphone #FromZeroToHomeAutomation #15
Welcome to the From Zero to Automatic Home series. I will take you with me on an adventure of creating an automatic home from scratch based on Home Assistant. I will try to put into this series all the things I do on my new equipment. I do everything from scratch! There will be a lot of it…
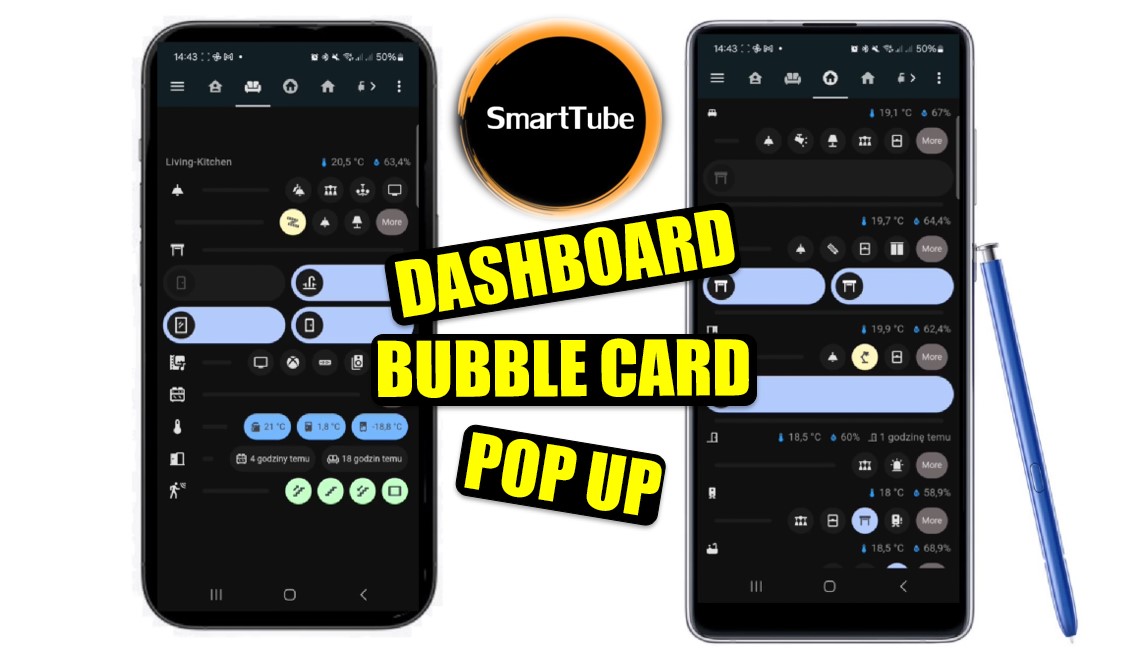
In this episode I will show you how to create a dashboard for mobile using bubble cards, pop ups and how to color everything to your liking. If you have any questions or something is not working for you, write in the comments. Good luck!
Code for coloring various elements below.
Coloring the button, first the background and the second thing is the color of the icon:
        styles: |
          .bubble-button-background {
            opacity: 1 !important;
            background-color: ${state === 'on' ? '#FFABAB' : ''} !important;
          }
          .bubble-icon {
            color: ${hass.states['input_boolean.home_alarm'].state === 'on' ? 'white' : ''} !important;
          }
Coloring the button based on its state in several options, 3rd row and 4th thing is changing the color of the sensor state font:
        styles: |
          .bubble-button-background {
            opacity: 1 !important;
            background-color: ${state > '4' ? '#FFC247' : ''} !important;
          }
          .bubble-button-background {
            opacity: 1 !important;
            background-color: ${state > '5' ? '#FFA447' : ''} !important;
          }
          .bubble-button-background {
            opacity: 1 !important;
            background-color: ${state > '6' ? '#FF8547' : ''} !important;
          }
          .bubble-state {
            color: ${state > '4' ? 'black' : ''} !important;
          }
Coloring sub-buttons, first the background depending on the state and then the second thing is the icon, note the numbering. The following code colors the first sub-button:
    styles: |
      .bubble-sub-button:nth-child(2) {
        background-color: ${hass.states['light.frontyard_grass'].state === 'on' ? '#FFF5BA' : ''} !important;
      }
      .bubble-sub-button-1 > ha-icon {
        color: ${hass.states['light.frontyard_grass'].state === 'on' ? '#41444B' : ''} !important;
      }
The next code colors a few more things. First the background, then the sensor value/text, and finally we change the icon color:
    styles: |
      .bubble-sub-button:nth-child(2) {
        background-color: ${hass.states['binary_sensor.frontyard_c_wicket_contact'].state === 'on' ? '#FFBEBC' : ''} !important;
      }
      .bubble-sub-button:nth-child(2) {
        color: ${hass.states['binary_sensor.frontyard_c_wicket_contact'].state === 'on' ? '#41444B' : ''} !important;
      }
      .bubble-sub-button-1 > ha-icon {
        color: ${hass.states['binary_sensor.frontyard_c_wicket_contact'].state === 'on' ? '#41444B' : ''} !important;
      }
The next code block shows the background coloring and sensor value color without any dependencies:
    styles: |
      .bubble-sub-button:nth-child(2) {
        background-color: ${'#6EB5FF'} !important;
      }
      .bubble-sub-button:nth-child(2) {
        color: ${'#41444B'} !important;
The last code is for coloring the sliders and icon:
        styles: |
          .bubble-range-fill {
            background: rgba(175,203,255,1) !important;
            opacity: 1 !important;
          }
          .bubble-icon {
            color: ${hass.states['cover.masterbedroom_window'].state === 'open' ? 'white' : ''} !important;
          }
Affiliate link to Aliexpress, thanks! https://s.click.aliexpress.com/e/_DD72ldL
I encourage you to subscribe to the channel, thanks for the like and watching.









Post Comment