Sliding entrance gate on WiFi for PLN 50. FAAC 740 engine, Shelly 1

Sliding driveway gate with WiFi for PLN 50! The gate has a FAAC 740 engine, and I installed Shelly version 1 to the engine.
Where you can buy shelly?
Amazon: https://amzn.to/3U7SPIt
Shelly 1 technical data, how to add Shelly 1 to the Shelly Cloud application, basic connection diagrams: https://shelly.cloud/documents/user_guide/shelly_1.pdf
Shelly 1 works very well with Home Assistant, more about the project here: https://www.home-assistant.io/
If you want Shelly 1 to work with Google Assistant, you must first connect your Shelly account to Google.
If you are looking for an Aqara contact switch, on the day the video was published I found the best price here: https://s.click.aliexpress.com/e/_AW2wTs
Engine technical manual: https://www.fonda.pl/bramy/740-741In.pdf Subscribe, comment and leave a like. Thanks!
Video material in text form:
Welcome to SmartTube! In today’s video, I’ll show you how to connect a Shelly 1 smart module to the FAAC 740 gate engine, turning your sliding gate into a WiFi-enabled smart gate for just $12.
Disclaimer
Before we begin, please note that you’re making these modifications at your own risk. I’m not a licensed electrician, so proceed with caution and follow safety guidelines.
About the FAAC 740 Engine
The FAAC 740 engine has served me well, no matter the weather—rain, snow, cold, or heat. It consistently performs, though the gate’s mechanical quality isn’t perfect. Occasionally, the gate doesn’t open due to resistance. However, the engine itself has no issues and offers both manual and remote control operation.
To manually operate the gate:
- Unlock it using the provided key.
- Adjust the position of the locking mechanism to allow manual movement.
Preparing the Engine for Shelly 1
To integrate Shelly 1, you’ll need to access the internal wiring of the FAAC 740. Here’s how:
- Remove Covers:
- Unscrew the bolts securing the side and top covers.
- Use an 8mm socket wrench to remove one bolt per side and lift the cover.
- Turn Off Power Supply:
- Safety first! Make sure to disconnect the power before touching any wires.
- Access the Connection Block:
- Unscrew the screws securing the internal connection block for better access.
- I recommend removing the block to simplify the wiring process.
Wiring Shelly 1 to the Gate Engine
Connecting Shelly 1 requires a few simple steps:
- Identify the connection points on the terminal block:
- Blue (N) connects to terminal 9.
- L (Live) connects to terminal 8.
- Shelly outputs connect to terminals 1 and 7.
- For this setup, Shelly 1 can run directly on 230V, so there’s no need to adjust the internal bridge for a 12V setup (as in some of my previous projects).
Configuring the Shelly 1 Module
After wiring the Shelly 1:
- Reconnect the power supply.
- Add the Shelly 1 to the Shelly app.
- Detailed installation instructions are available in the video description.
- Configure two key settings in the Shelly app:
- Auto-Off Timer: Set to 0.5 seconds.
- Button Type: Set to “Toggle Switch.”
These settings ensure smooth operation for opening, stopping, and closing the gate.
Controlling the Gate
With Shelly 1 integrated, you can control the gate via:
- Shelly App: Open, stop, and close the gate from anywhere with an internet connection.
- Google Assistant or Alexa: Integrate Shelly with Google Home or Alexa for voice commands or routines.
For example:
- Use Google Assistant routines like “Open Front Gate” or “Close Front Gate” for simplified commands.
Monitoring the Gate Status
One challenge with this setup is knowing whether the gate is open, closed, or in motion. Here’s how I solved it:
- Camera Monitoring: A camera provides a live view of the gate’s position.
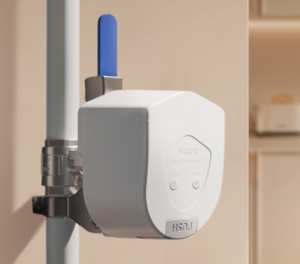
- Reed Switch Sensor: I installed an Aqara reed switch on the gate. This sensor:
- Tracks whether the gate is open or closed.
- Triggers automations in Home Assistant.
Home Automation Integration
Using Home Assistant, I created additional automations:
- Lighting Automation: When the gate opens at night, the lights in front of the house turn on automatically (using a Sonoff Mini).
- Phone Notifications: Receive alerts when the gate opens or closes.
I’ll cover these automations in more detail in a future video.
Additional Features
- An LED strip lights up when the gate is open and automatically turns off after a set time with no movement (thanks to a motion sensor).
What’s Next?
That’s all for today’s guide to building a smart entrance gate for just $12. In the next video, I’ll unbox an electric curtain rod—don’t miss it!
If you found this video helpful, consider subscribing to SmartTube and sharing your thoughts in the comments. Thanks for watching, and see you next time!


Post Comment