First Launch of Home Assistant Entities Groups Backup etc. From Zero to Home Automation #2
Welcome to the From Zero to Automatic Home series. I will take you with me on the adventure of creating an automatic home from scratch based on Home Assistant. I will try to include in this series all the things I do with my new equipment. I’m doing everything again! There will be a lot of it…
In this episode we will go through the first configuration of Home Assistant, talk a little about devices, entities and areas and work on them. We will create the first cards, simple and more complicated, and go through the process of creating a group of entities – for lights. Finally, we will upload the first add-on, which creates backup copies of our system and automatically uploads it to Google Drive.
Video in text form:
The second episode of the series From Zero to Automatic House, where we take the first steps in Home Assistant, covering the following basics:
- Configuring devices and areas in Home Assistant
- Creating your first cards and light groups
- Installing the backup add-on
- Exploring other useful features
All this and much more is covered in this material. SmarTube invites you to subscribe!
Home Assistant Installed
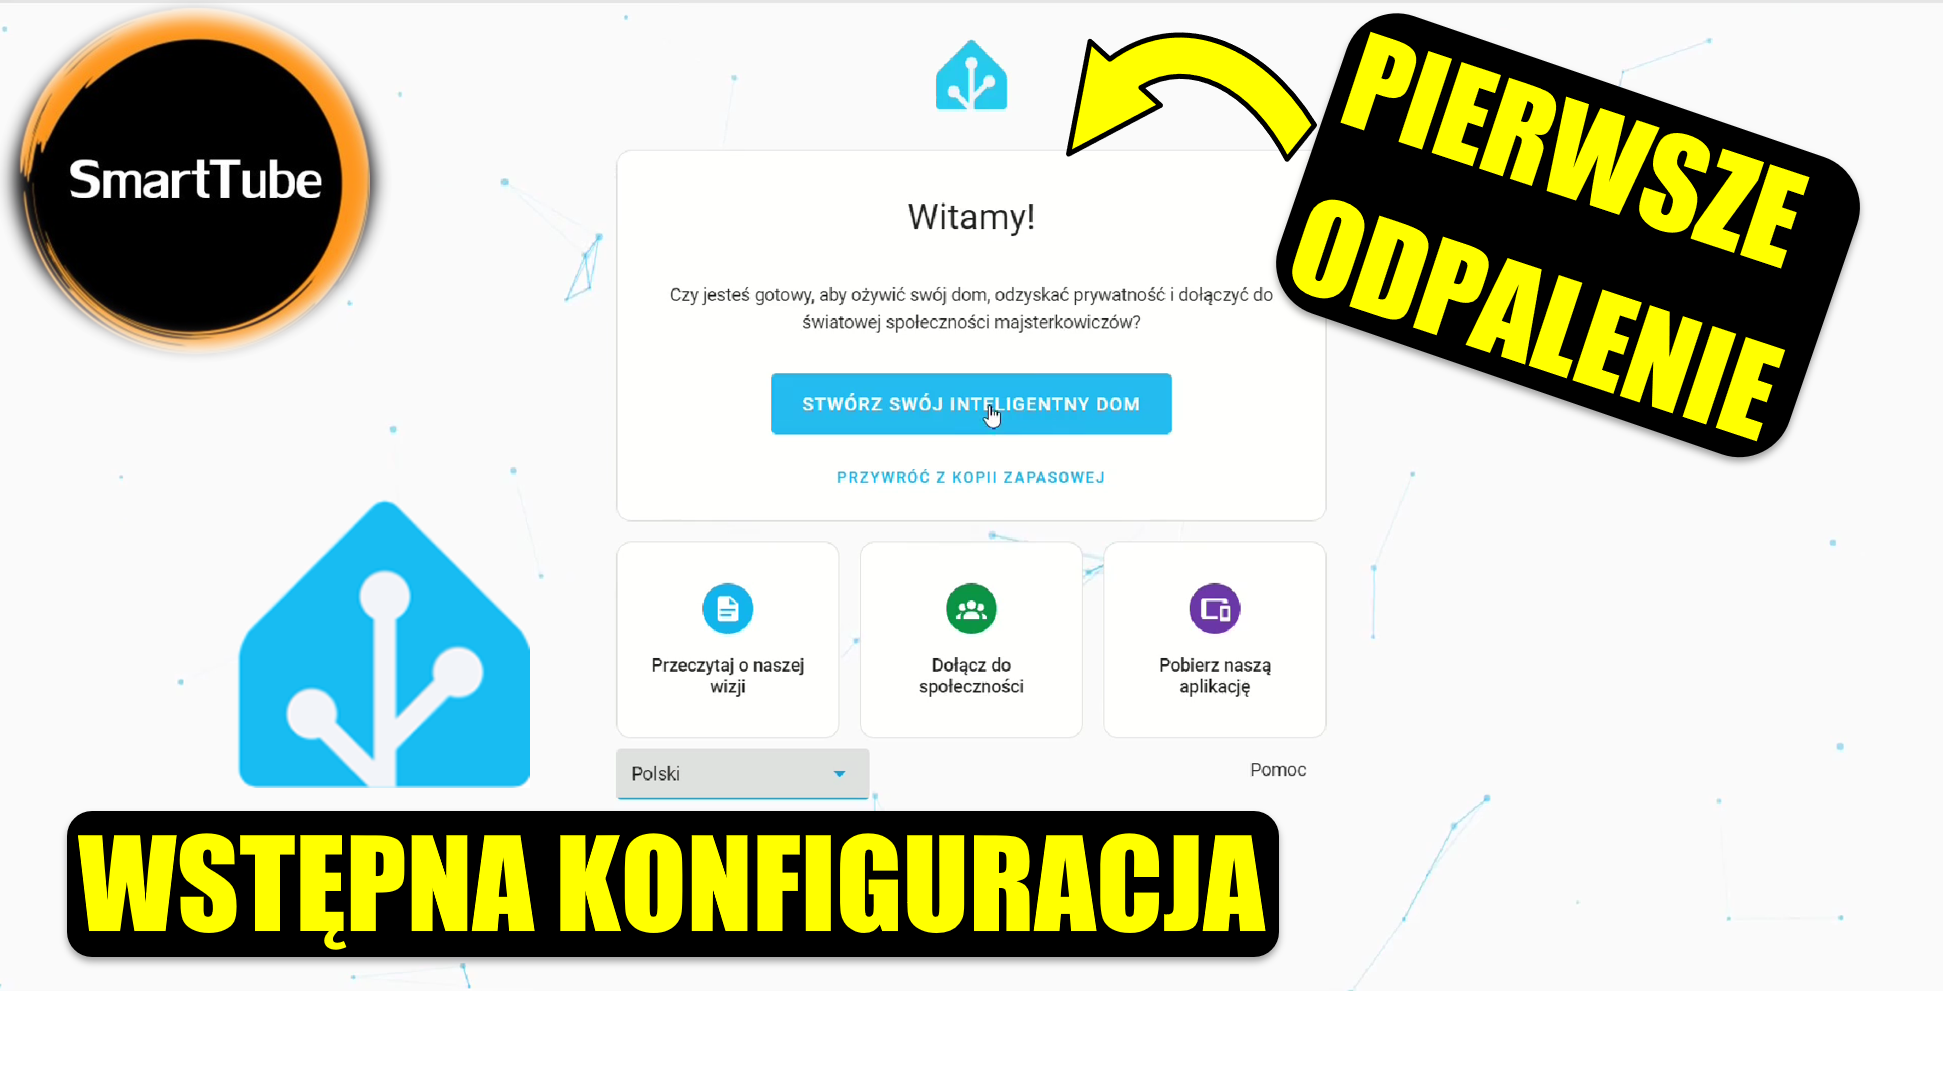
Let’s get started with Home Assistant. First, we need to log in. Assuming you already know the IP address of your Proxmox server (e.g., 192.168.3.124:8123), we can access the Home Assistant interface.
- Language Settings: Upon entering, we can change the default language to Polish. Although I usually use English in my other setups, we’ll proceed in Polish for this demonstration.
- Create an Account: Since we’re starting from scratch, we’ll create a new account:
- Username: Adam
- Password: (choose a strong, unique one)
- Set Your Location: Location setup is important for automations, like sending notifications when someone enters an area (e.g., “Child arrived at school”).
- Data Sharing: You can choose to share anonymized data with Home Assistant to help improve the platform and identify popular features.
Device Detection
Home Assistant has already detected a range of devices:
- TVs
- Brother Printer
- Light Bulbs (some connected via WLED)
- Google Cast Speakers (e.g., Chromecast)
- Water usage monitor via ESPHome
- Window blinds (though some have failed over time)
These devices appear automatically, but they often require configuration for clarity and usability.
Organizing Devices and Entities
Entities detected by Home Assistant come with generic technical names (e.g., enc_wet_2). To make them user-friendly:
- Rename Entities:
- Use a clear naming convention, such as:
- Room Name → Location → Device Type
- Example: Children’s Bedroom Bed Maja
- Keep names in English for easier integration with Google Home.
- Use a clear naming convention, such as:
- Assign Areas:
- Areas group devices by physical location (e.g., “Children’s Bedroom”).
- Edit settings under Device Information to assign the correct area.
Creating and Customizing Cards
To control devices effectively, we’ll create cards on the dashboard:
- Basic Cards:
- Use Tile cards for a clean, organized layout.
- Example: Horizontal layouts for lights, stacked vertically in a single card.
- Advanced Configurations:
- Use a Vertical Stack for rows and combine with Horizontal Layouts for individual controls.
- Add lights, such as:
- Children’s Bedroom Bed Lea
- Children’s Bedroom Bed Maja
- Kitchen Table Light
- Icons and Appearance:
- Adjust icons and names to ensure consistency across the interface.
Grouping Lights
Turning lights on/off individually can be tedious. To simplify this, we can create light groups:
- Go to Settings > Helpers > Create Helper.
- Select the “Group” option and configure it as follows:
- Name: All Lights
- Entities: Add all lights (e.g., LED strips, bulbs, etc.)
- Keep individual lights visible for manual control.
Once done, a single click will control all the lights in the group.
Final Notes
We’ve now:
- Configured devices and areas
- Renamed entities for clarity
- Created an organized dashboard with cards
- Set up light groups for efficient control
In future episodes, we’ll dive into more advanced automations, scenes, and integrations to make your smart home even smarter. Stay tuned, and don’t forget to subscribe to SmarTube for more tutorials!


Post Comment